

1. Choose what you are starting with
Use the closest example. You can change its wording before sending it.- A product or website
- Notes or an idea
- Existing footage
- A pull request
- A song
This is the request behind the film on What HyperFrames is — the
same project is used as the example throughout these pages.
2. Install the HyperFrames guidance
Open the project folder in your agent and run:/hyperframes router adds a specialized creation workflow when the request needs one.
Start a fresh agent session if
/hyperframes is not recognized after installation.3. Send the request
Paste the request you chose, attach or link the real source material, and add anything that must be accurate. A useful first request answers:- What should exist when the work is finished?
- Who will watch it?
- What source should the agent use?
- What format, duration, or tone matters?
- What must appear, and what must not?
4. Approve the creative direction
Before building a fresh project, the agent confirms the important choices. Read the response like a short creative brief:- Is the main message correct?
- Does the audience match?
- Is the proposed format and length useful?
- Does the visual direction fit?
- Are exact claims, words, screens, and exclusions captured?
5. Review the first version in Studio
The agent starts Studio and gives you a local project link. Watch the complete video once before editing individual moments.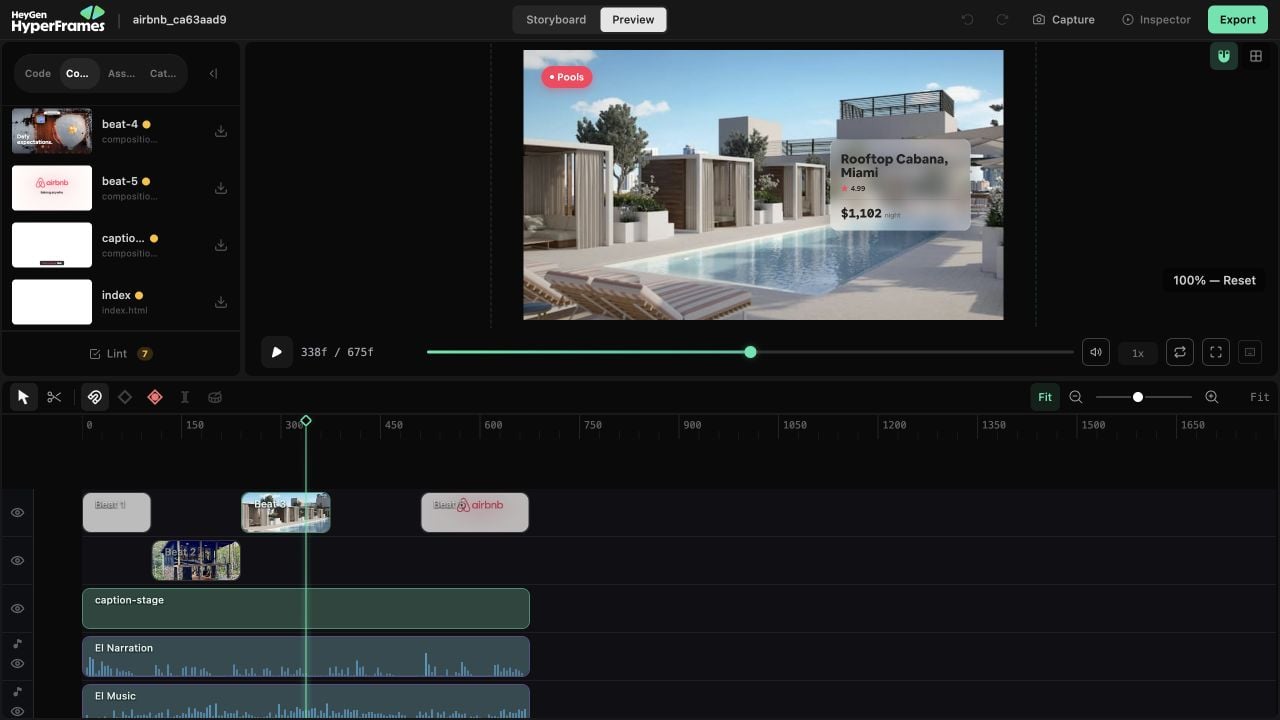
Studio opens the real project so you can review the sequence, select visible elements, change timing, and export versions.
- Can a new viewer understand the opening?
- Is the main promise or idea accurate?
- Does every scene earn its time?
- Can text be read before it leaves?
- Does the ending give the viewer somewhere to land?
6. Export the result
Open Renders, choose the format and resolution, and start the export.- Choose MP4 for a normal finished video.
- Choose WebM or MOV when another workflow needs transparency or a specific codec.
- Watch the exported file once, including the final frame and audio ending.
You are done when…
You have a video that plays in Studio or an exported file you can watch. Installation alone is not the finish line.Now make something specificChoose a workflow →A launch video, an explainer, captions on footage, a PR walkthrough, a motion graphic, a music-driven cut, or a presentation. Each path tells you what to give the agent.
Also useful from here: learn the workspace properly in Studio, find a ready-made scene in the Catalog, or start from a visible symptom in Get unstuck.